
Kolupsy 发布了一款使用 GPU 模块实时捕获 EEVEE 摄像机视图状态并应用到纹理的 Blender 脚本,已在 Blender Artists Community 公布。
Live Scene Capture to Texture
uh oh… #b3d pic.twitter.com/m0IPDJq0In
— Kolupsy (@kolupsy) May 15, 2022
Blender Artists Community での解説
Live Scene Capture to Texture – General Forums / Blender and CG Discussions – Blender Artists Community
说明一下如何实时渲染场景,并将结果输出为纹理。这在游戏中常用于传送门效果等,但对 Blender 这样的离线渲染软件来说并非必需功能。不过,这项技术似乎仍有需求。这个帖子起因于 Twitter 上经常有人要求拆解这个效果。
为了实现这个效果,我们利用了 Blender API 中隐藏但非常强大的部分:GPU 模块。关于 GPU 模块的详细说明,请看这里。
查看那里列出的许多示例,可以找到从离屏渲染生成图像的代码片段,以及从摄像机捕获场景视图并以 UI 上的小窗口形式显示的代码片段。将这两种技术结合起来,就可以实现“实时纹理”效果。
制限事項
- 仅可在视口、材质预览、Eevee 渲染中运行
- 无法捕获 Cycles 渲染
- 性能不佳
- 脚本不会处理渲染时的更新,但据说通过应用处理器技术上可以实现
- 捕获内容始终包含全部可见 UI。如果只想捕获场景的相关部分,需要切换覆盖层
ヒント
- 建议 Eevee 的视口采样数设为 1 或 0
- 建议关闭视口降噪
- 可设置脚本分辨率:当前为 1:1。可以设为任意分辨率,但建议使用低分辨率。即使 256×256 也相当吃性能。512×512 在简单场景中效果很好
- 如果想对脚本进行反复修改,建议每次更新脚本时都重新打开 Blender,或者自行实现脚本更新功能。
導入方法(日本語解説)
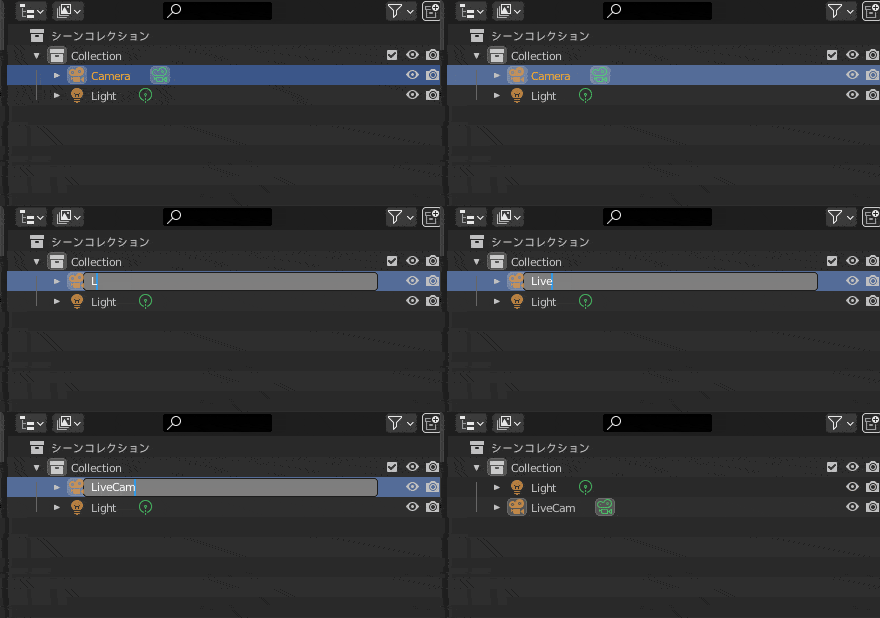
在场景中创建一个摄像机,并将其命名为「LiveCam」。
显示文本编辑器窗口,新建。
将公开的以下脚本粘贴进去并按下运行按钮。
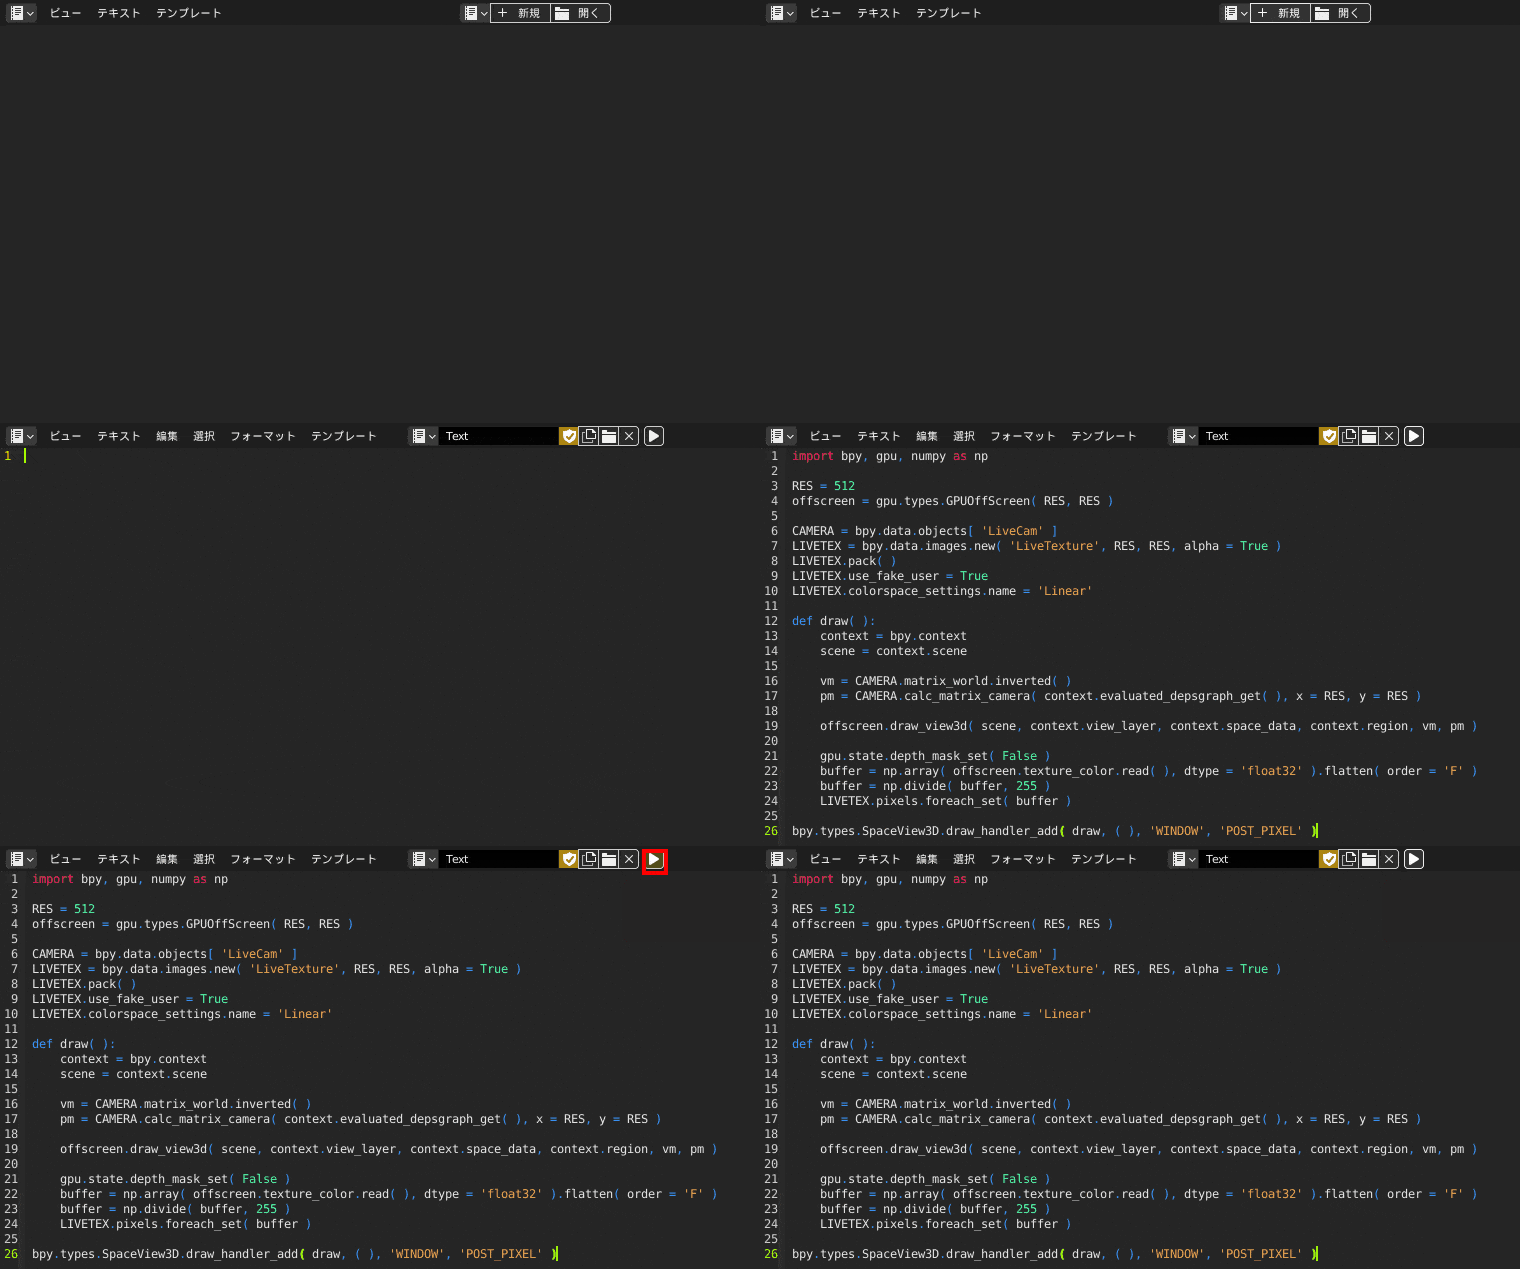
import bpy, gpu, numpy as np

RES = 512
offscreen = gpu.types.GPUOffScreen( RES, RES )

CAMERA = bpy.data.objects[ 'LiveCam' ]
LIVETEX = bpy.data.images.new( 'LiveTexture', RES, RES, alpha = True )
LIVETEX.pack( )
LIVETEX.use_fake_user = True
LIVETEX.colorspace_settings.name = 'Linear'

def draw( ):
    context = bpy.context
    scene = context.scene

    vm = CAMERA.matrix_world.inverted( )
    pm = CAMERA.calc_matrix_camera( context.evaluated_depsgraph_get( ), x = RES, y = RES )

    offscreen.draw_view3d( scene, context.view_layer, context.space_data, context.region, vm, pm )

    gpu.state.depth_mask_set( False )
    buffer = np.array( offscreen.texture_color.read( ), dtype = 'float32' ).flatten( order = 'F' )
    buffer = np.divide( buffer, 255 )
    LIVETEX.pixels.foreach_set( buffer )

bpy.types.SpaceView3D.draw_handler_add( draw, ( ), 'WINDOW', 'POST_PIXEL' )
如果没有问题,场景中会出现名为 LiveTexture 的纹理文件。
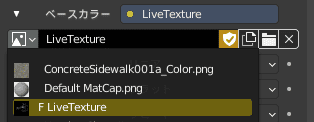
接下来只要将其应用到模型上,就能得到实时捕获结果。
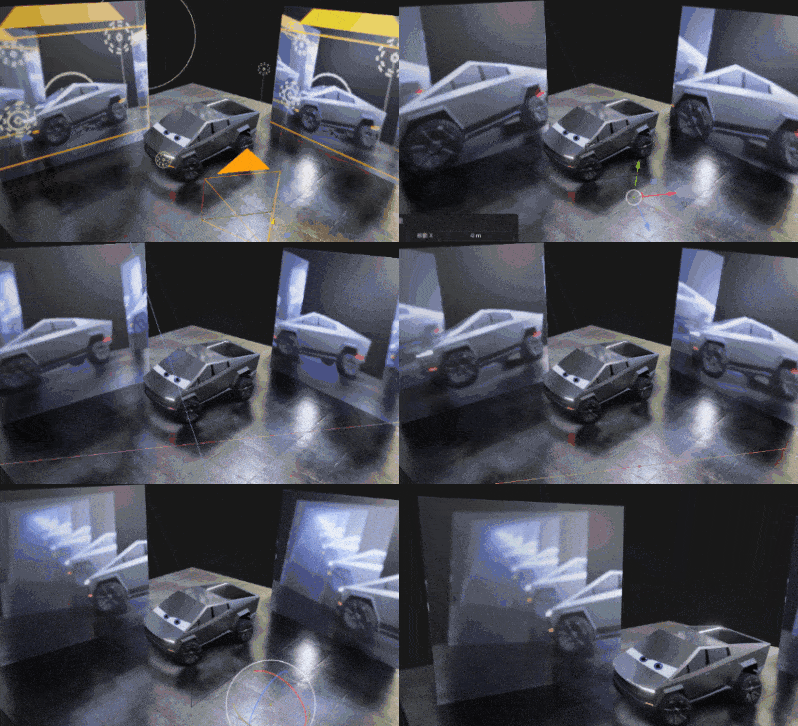
由于 GPU 负荷很高,在某些环境下会变得相当卡顿,请注意。
如果实在太卡,建议先将 RES = 512 的数值改为 64 或 128 之类的小数值试试。
感谢 Kolupsy 公开了这样的技巧!请务必尝试一下!
リンク
I did the thing @IdoineTutorials TV effect on the live texture capture 😀 used an old scene to have something to capture. Man moiree even hurts when you do it intentionally #b3d #bnpr https://t.co/3xVzTA9zS9 pic.twitter.com/Zs0zRcdeoi
— Kolupsy (@kolupsy) May 15, 2022